In my last post, I explained how to use two simple embroidery stitches to make eyes for your stuffed animals and dolls. Now let’s take a look at appliqué. The name may sound daunting, but the technique is very simple. It is simply attaching a small fabric shape to the top of a larger piece of fabric. I use this style of eye for larger stuffed animals, like my rabbits, and for my puppets.
To make an appliquéd eye, first select a fabric that won’t fray at the edges. I like to use felt because it’s easy to cut and isn’t too expensive.
Once you have your fabric, cut out a shape to use for the eye. This could range from a circle to a half moon to something else entirely. You may want to cut out a few shapes from paper and lay them on your stuffed animal’s face to see how they look before cutting fabric shapes.
When you have finalized the shape of the eyes and cut them out, position them on the animal’s face. Try a few different positions to find the best one for your stuffed animal. When you’re satisfied, pin the shapes in place. Sew around each piece, staying very close to the edge, and remove the pins. You can also use glue to secure the eyes, although this may not work with certain fabrics. Whether with glue or thread, the eyes are now tacked down so they won’t slip when you overcast the edges. On the other hand, you could leave the eyes just the way they are if you aren’t comfortable with the difficulty of overcasting.
What is overcasting? This technique is when you cover the edges of your appliqué piece with a solid line of stitches. This protects the edges from fraying and makes the toy last longer. It also gives the eye a more finished look.
Before we get to that step though, you’ll need to cut out pupils. Attach the pupils to the whites of the eyes in the same manner as you attached the whites to the face.
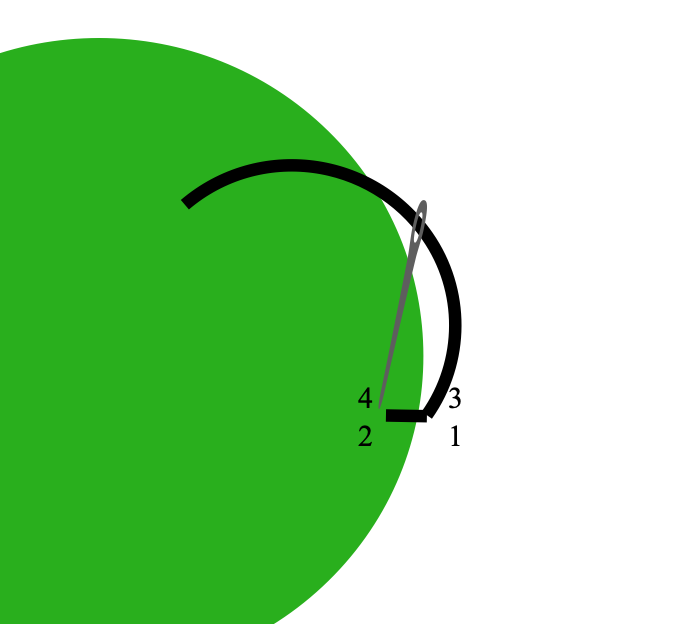
Now we can overcast. Using embroidery thread, bring your needle up just outside of the piece you are overcasting. Make a stitch by bringing your needle down just inside the shape, covering the stitches you used to tack it down. Make another stitch right next to the first so there is no gap between them. Continue in this fashion until you have gone all the way around the eye. Tie off your thread at the back of the fabric.
Just as a note, I recommend overcasting the pupil first, rather than the white. It will help to secure the white even more and, depending on the shape of the eye, the pupil may overlap the edge of the white. If the pupil is right in the middle of the eye, then the order you overcast them doesn’t matter. But in most cases it’s easier to start with the pupil.
You can also overcast by machine if you aren’t inclined to hand embroider. I enjoy doing it by hand, so I don’t mind the time it takes.

Now that you know how to make two different styles of eyes, let me show you how to make them look more alive with a highlight. This is a really simple technique that I use for all my stuffed animals. First, bring up some white embroidery thread through the eye. I usually like to place it near the top and slightly forward, but some animals are different. Experiment to find the position that gives your toy the best expression. I like to take the knot at the end of my thread and hold it against the eye to test positions.
With your thread in place, simply make a knot. Make sure you slide the knot down to the level of the fabric or your eye highlight will be too loose. With the knot in place, bring your needle down almost where the thread comes up through the fabric. Tie off the thread at the back of the fabric, and you’re done!
So there you have it. With basic appliqué and embroidery skills, you can make a wide variety of eyes for your stuffed toys. Now get out there and create!