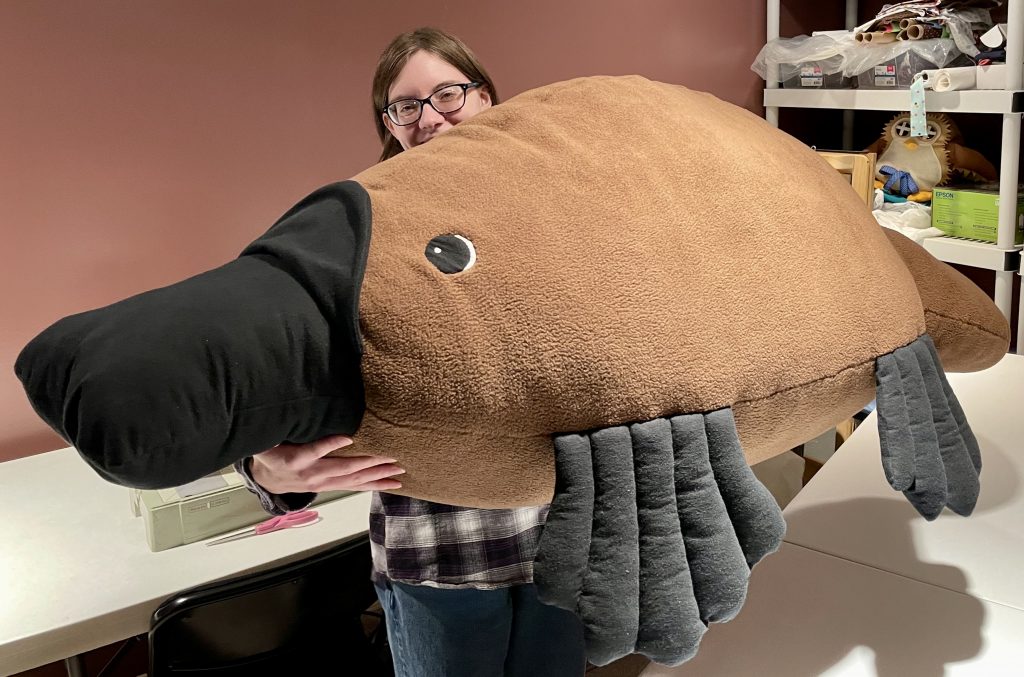
Late in November, a customer contacted me and asked if I could make a giant version of my platypus stuffed animal. The project sounded like a lot of fun, so I ran a few calculations and decided it would be possible to increase the size of the toy and assemble one in time to ship for Christmas. And so began my adventure in sewing a 60″ long platypus plush toy.
First of all, I needed to buy fabric. According to my calculations, I would need about 2 1/2 yards of fleece for the body of my platypus. I thought I would get 3 yards just to be on the safe side. Turns out, the store only had 2 1/2 yards of the material. I was a bit nervous about running out of fabric, but I figured I could always come back for more if necessary.
Once I had all my material, I set to work enlarging my pattern. Most of my patterns only exist in physical form, but thankfully I had already digitized this one. The new giant platypus would be 353% larger than the original. It was a simple matter to tell my computer to print at the larger scale, but putting the pattern together afterwards was a bit of a challenge! A cramped scissors hand and miles of tape later, I was finally ready to cut some fabric.
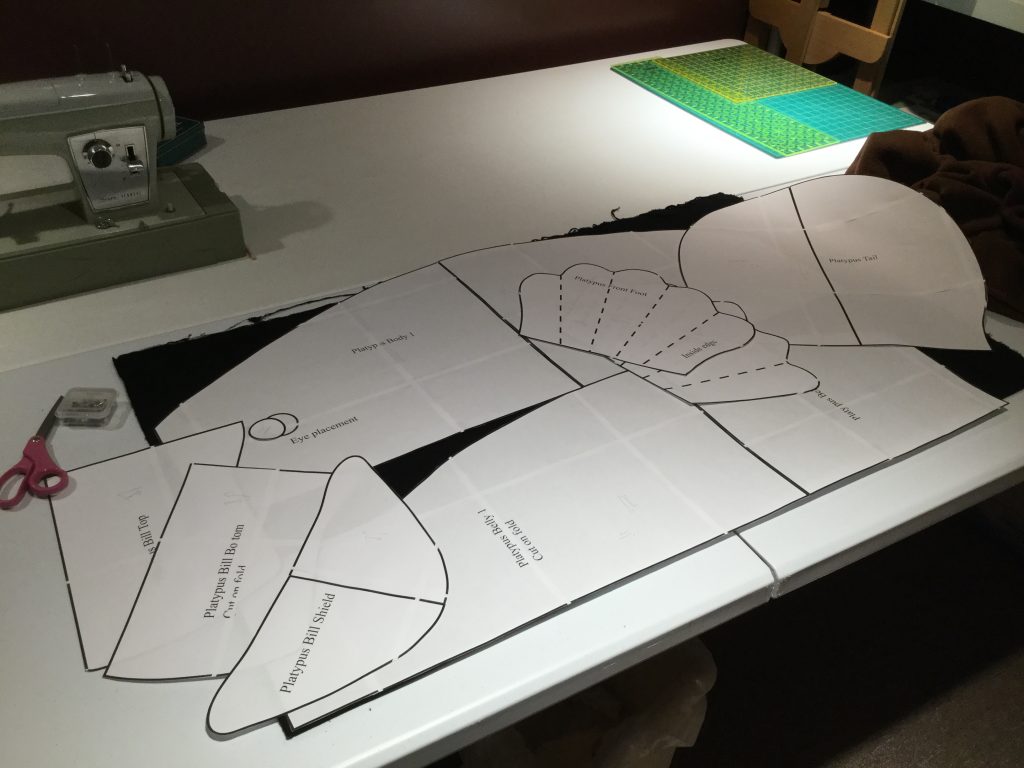
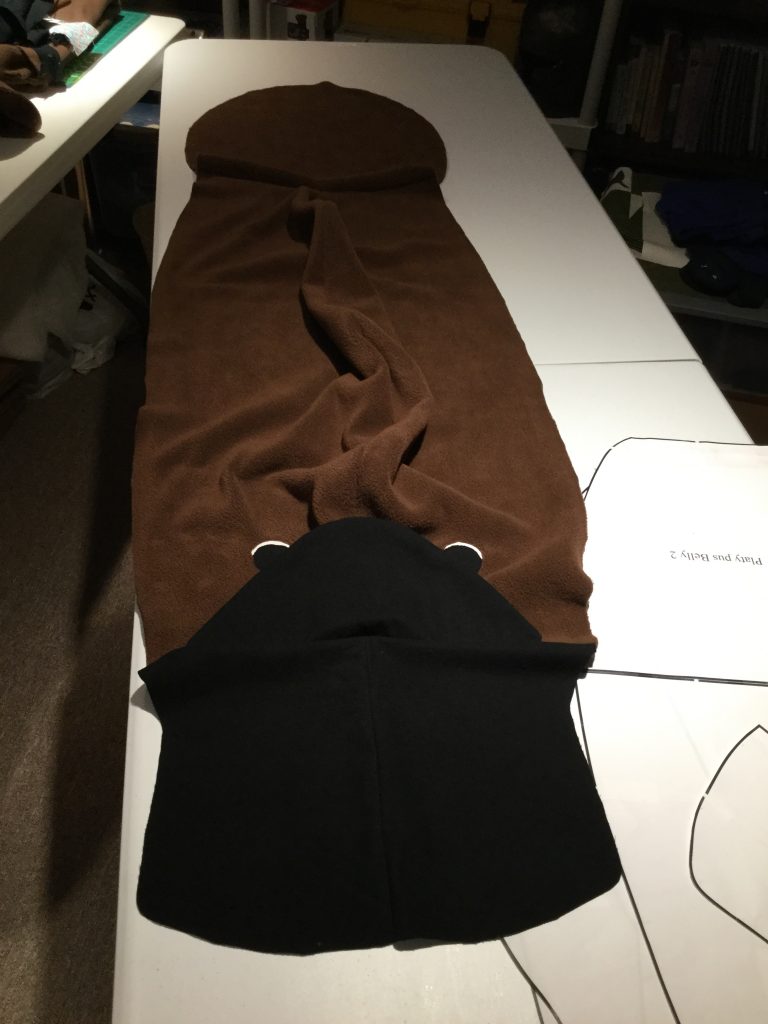
This project was so big, I had to set up an extra table just to hold my fabric. I started with the fleece, cutting out the body, belly, and tail pieces. And I had enough fabric after all, with some left over. Hurray! After cutting out the main pieces, I turned to my flannel and cut the feet and bill pieces.

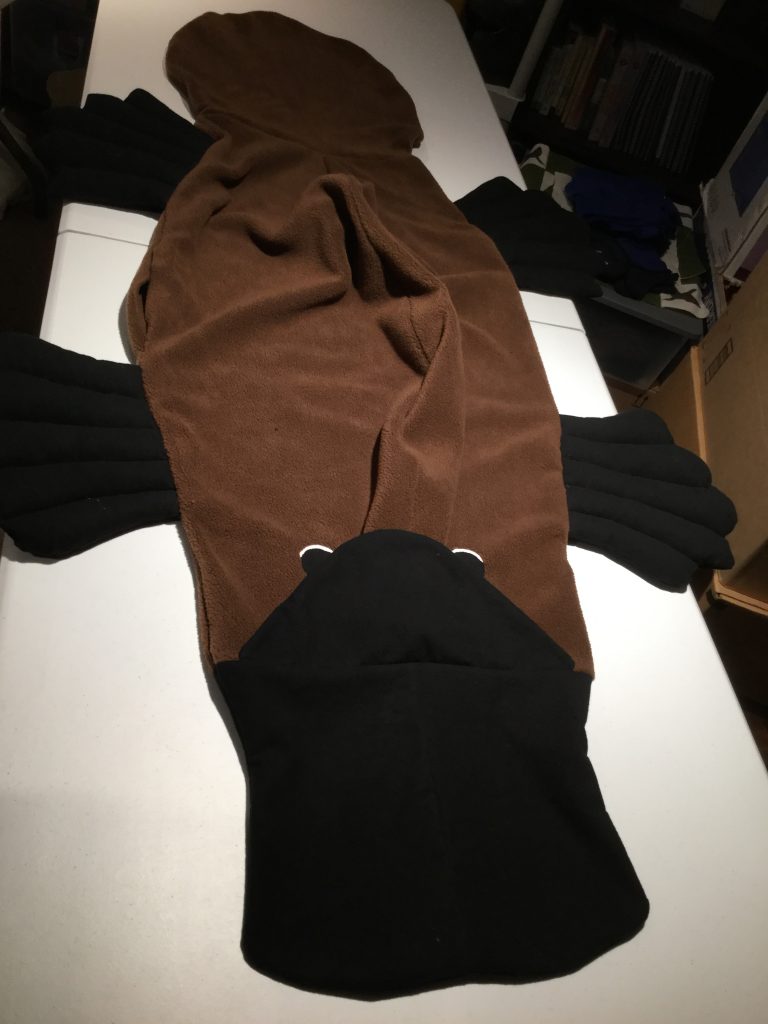
I decided it would best to follow my usual method of assembly. First, I sewed each pair of feet together, stuffed them lightly, and topstitched the toes.

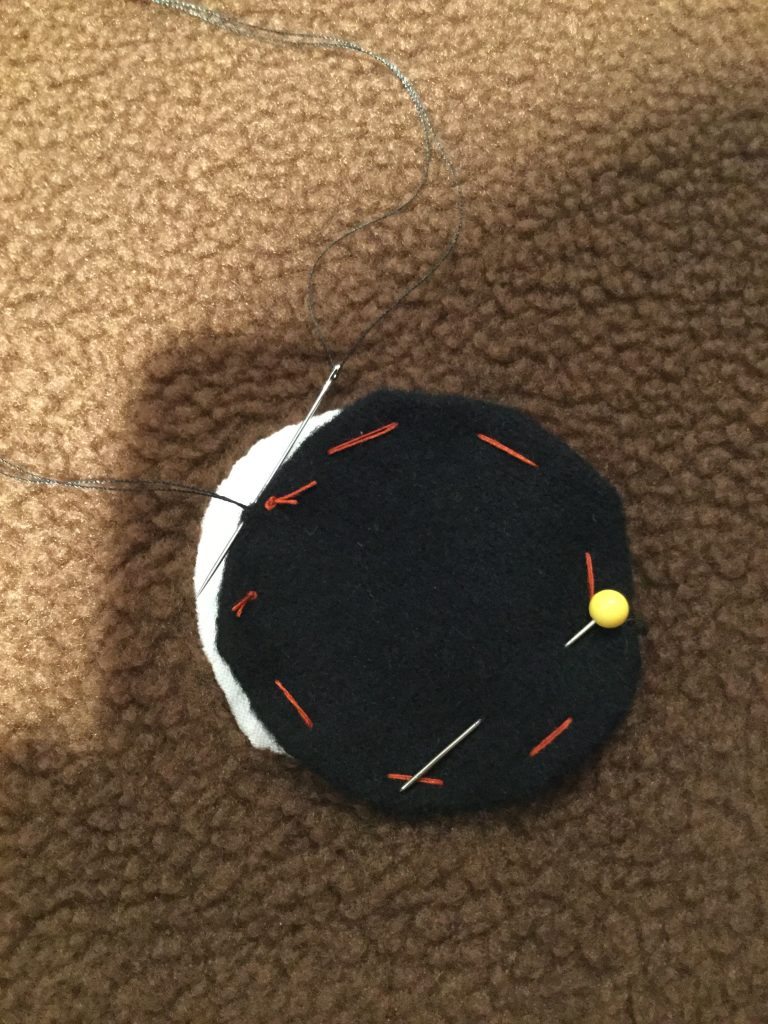
With the feet out of the way, I turned my attention to the eyes. Usually I embroider the eyes on my platypus stuffed animals, but that wouldn’t work for as large of an eye as I needed for the giant version. After considering a few options, I decided to use paper piecing. I cut out the shapes I needed from paper, basted the eye fabric to them, sewed the eyes to the body pieces, and then finished the eyes by embroidering highlights. I was very pleased with the result.
The next step in assembling the platypus was to stitch the two body pieces together along the back. After that as done, I added the tail and bill pieces to the both the body and the belly. Lastly, I sandwiched the feet between the body and belly pieces and basted them in place.
Now came the hard part. Sewing this monster together in my small space would be tricky. I didn’t have much room to maneuver my fabric and I knew it would hang over the edge of my table and drag on the machine. I took a deep breath and started to sew.
Yes, it was about as bad as I expected, but I made it through. All I had to do now was turn my platypus right side out and stuff it. Here I encountered an unexpected difficulty. The stuffing refused to stay in the platypus’ bill. No matter how much I put in there, it would slide out and leave an empty area. Finally, I got it to an acceptable point. I quickly filled in the face behind the bill to make sure the stuffing would stay put. Whew!
The rest of the stuffing went smoothly. There’s something to be said for being able to fit your entire hand into your stuffed animal projects. It’s so much easier to get the stuffing exactly where you want it, not to mention you can place a larger amount of stuffing at once.
With the stuffing finished, all that was left was to sew the platypus closed. I used an extra strong thread just to be safe.
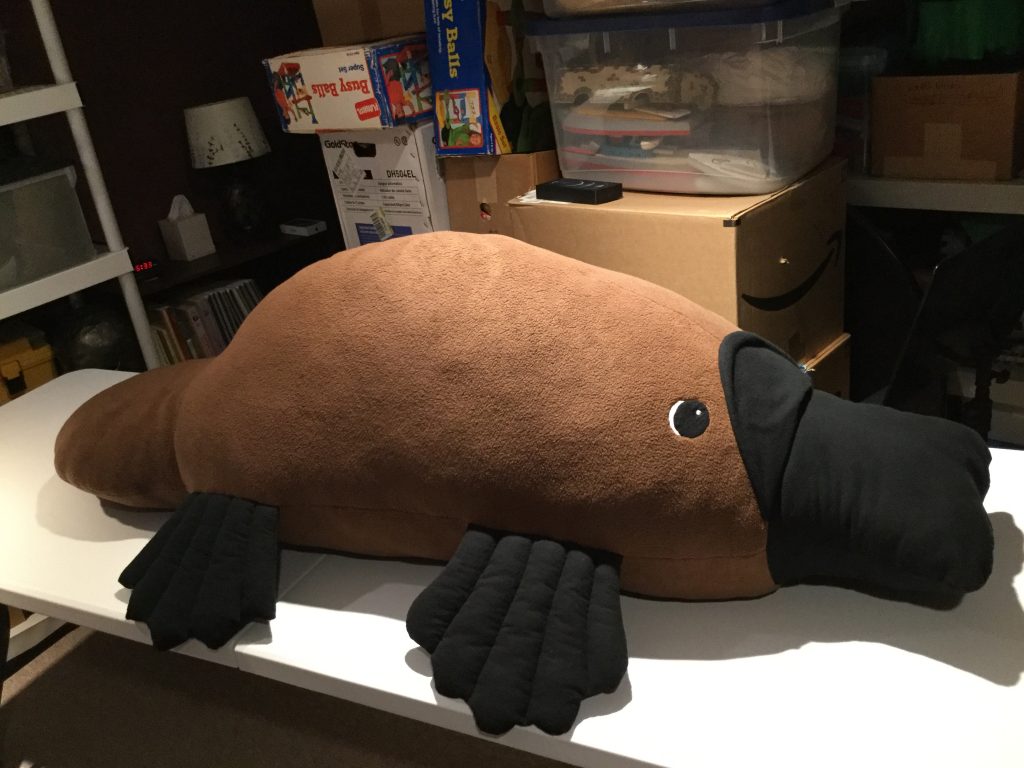
And it was done! Working for two weeks, I had made a five foot long platypus plush and had a fabulous time doing what I love.